반응형
섹션 14: Next.js 렌더링 1 - SSR
SSR(서버 사이드 렌더링) 이해하기
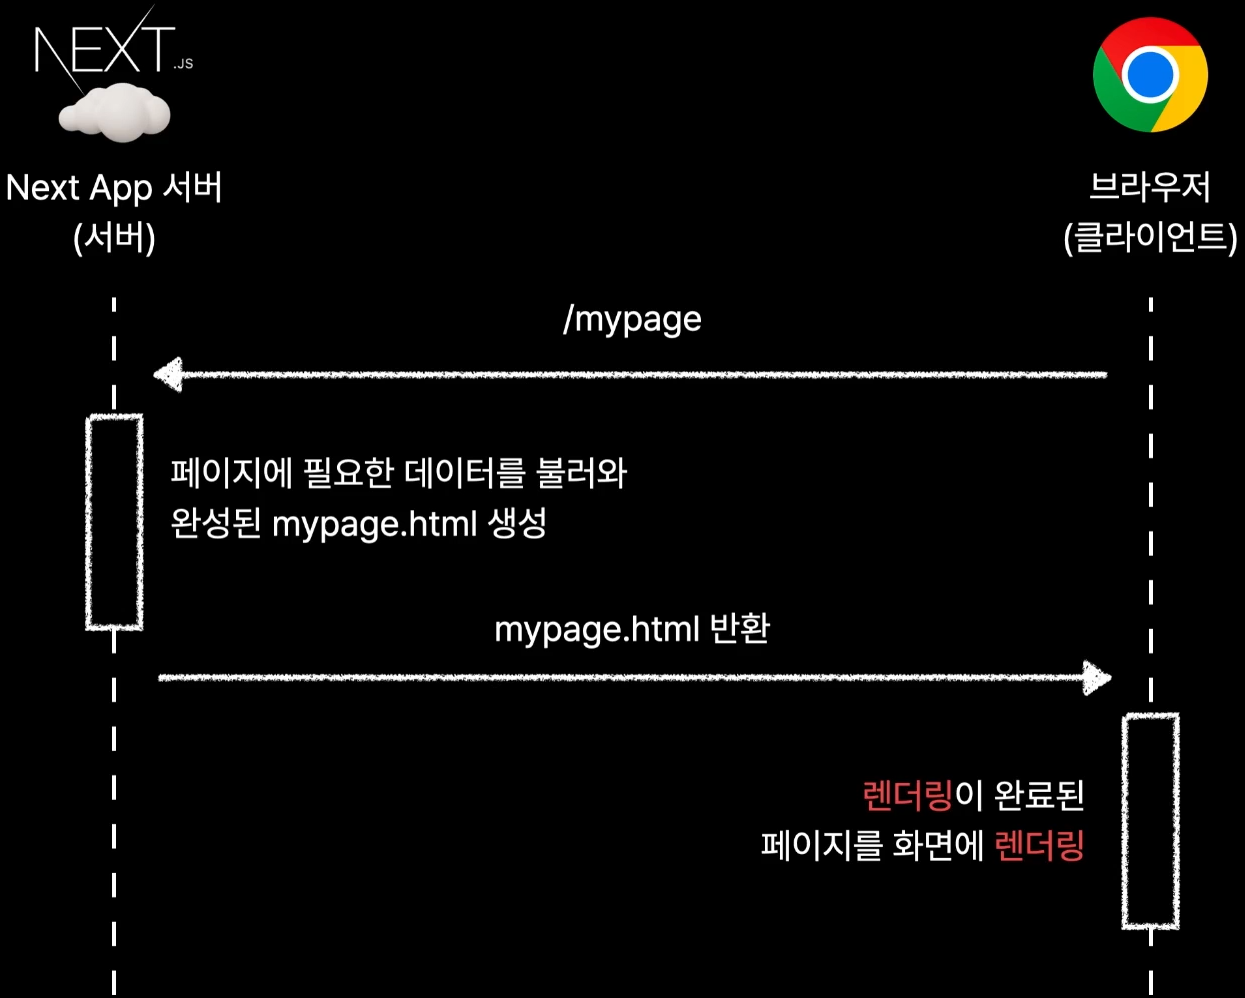
- 첫 번째 렌더링: 리액트 컴포넌트와 같이 js로 작성된 페이지를 실제 html 코드로 변환하는 과정
- 두 번째 렌더링: 변환된 html을 화면(브라우저)에 실제로 그리는 것
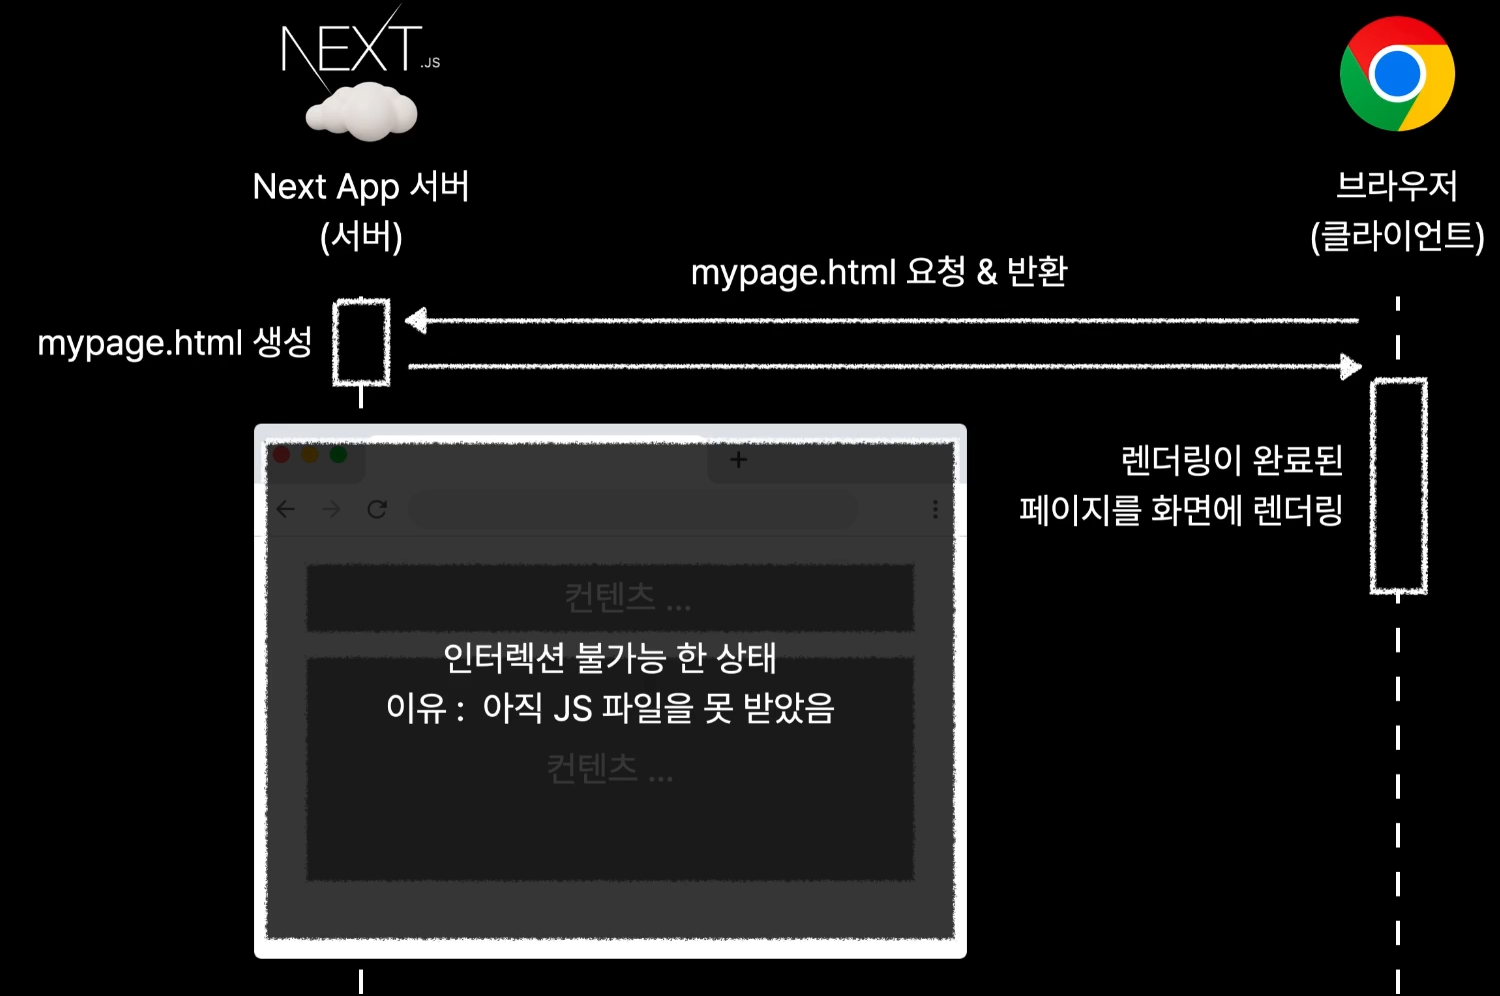

js 코드와 html 요소들을 서로 연결함 👉 Hydration (수화)
- 동작하지 않는 html 요소들에 js 코드를 연결시켜주는 과정
- 이 과정을 거치면 버튼, 인풋 등 브라우저와 상호작용이 가능해진다.
SSR(서버 사이드 렌더링) 적용하기 1
pages > index.js
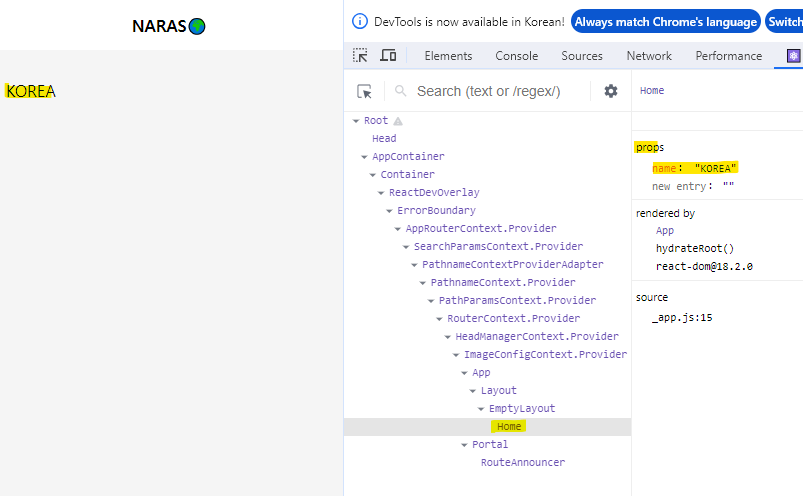
export default function Home({ name }) {
  return <div>{name}</div>;
}

// 해당 컴포넌트를 SSR 방식으로 동작하게 한다.
export const getServerSideProps = async () => {
  // SSR을 위해 서버측에서 페이지 컴포넌트에게 전달할 데이터를 설정하는 함수
  return {
    //반환값은 객체
    props: {
      //내부 값이 Home 컴포넌트에게 전달된다.
      name: "KOREA",
    }, //props의 값도 객체여야 함
  };
};
서버 측에서 먼저 렌더링한 뒤에 그 값을 이용해 화면을 렌더링한다.
서버 측에서 코드를 렌더링하기 때문에
- `console.log()` 함수를 실행해도 브라우저에 값이 찍히지 않는다.(터미널에서는 출력값을 확인 가능)
- `window.locaion`과 같이 윈도우 객체에 접근하려고 하면 에러가 발생한다. (`window`는 브라우저 관련 코드이고, node.js 환경에서는 존재하지 않는 값이기 때문) 👉 서버사이드에서 렌더링을 위해 클라이언트 코드에도 한 번은 접근하므로, 클라이언트 코드에도 `window` 사용 시 에러가 발생한다.
- 클라이언트에서만 코드를 실행하려면, 브라우저에서 마운트 발생 시에만 실행되는 `useEffect` 훅을 사용해 주면 된다.
SSR(서버 사이드 렌더링) 적용하기 2
홈
루트폴더 > api.js
import axios from "axios";

export async function fetchCountries() {
  try {
    //api: 비동기로 동작. 호출한다고 해서 바로 값이 response에 담기는 것이 아님
    //async: 내부에 await를 사용할 수 있게 됨
    //await: 비동기 코드를 기다렸다가 response에 넣어준다.
    const response = await axios.get("https://naras-api.vercel.app/all");

    return response.data;
  } catch (e) {
    //에러대응 코드
    return [];
  }
}

export async function fetchSearchResults(q) {
  try {
    const response = await axios.get(
      `https://naras-api.vercel.app/search?q=${q}`
    );

    return response.data;
  } catch (e) {
    return [];
  }
}

export async function fetchCountry(code) {
  try {
    const response = await axios.get(
      `https://naras-api.vercel.app/code/${code}`
    );

    return response.data;
  } catch (e) {
    return null;
  }
}
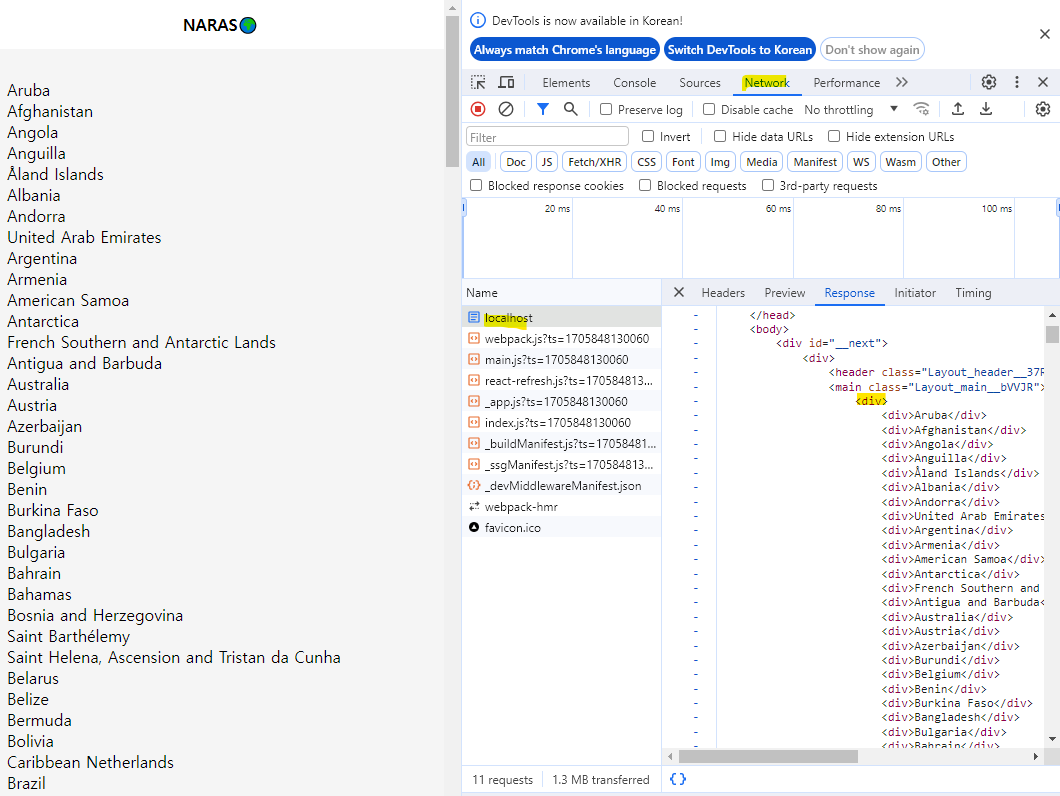
pages > index.js
import { fetchCountries } from "@/api";

export default function Home({ countries }) {
  return (
    <div>
      {countries.map((country) => (
        <div key={country.code}>{country.commonName}</div>
      ))}
    </div>
  );
}

// 해당 컴포넌트를 SSR 방식으로 동작하게 한다.
export const getServerSideProps = async () => {
  const countries = await fetchCountries();

  return {
    props: {
      countries,
    },
  };
};
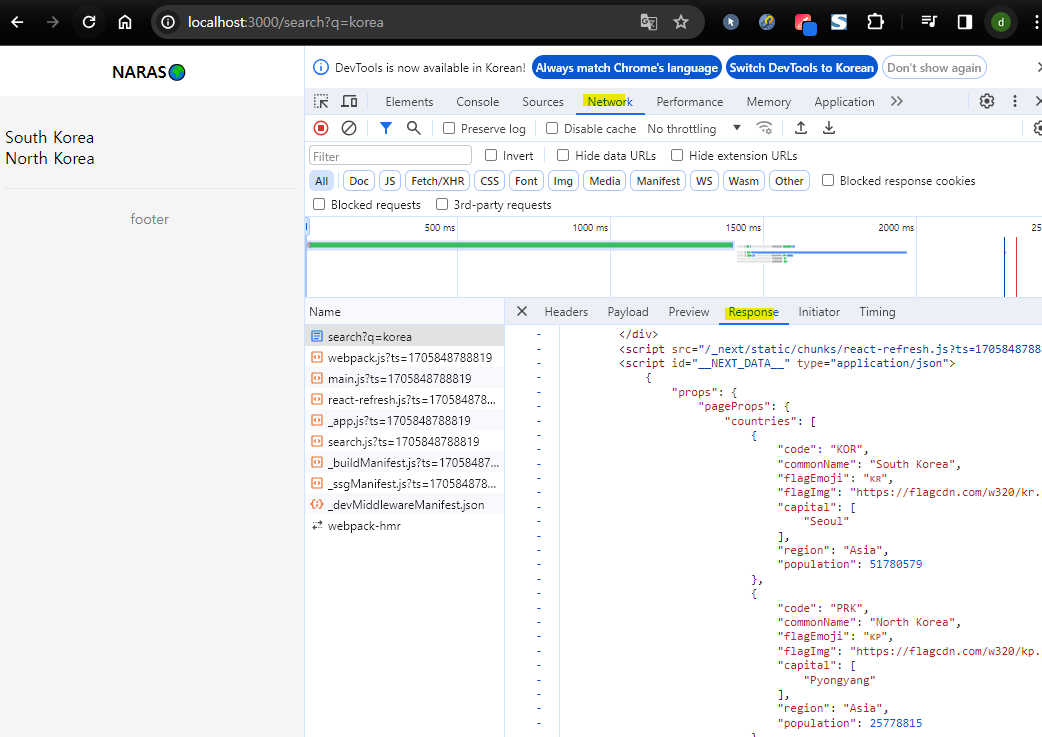
Search (쿼리 스트링 이용한 동적 라우팅 필요)
search 폴더 > index.js
import { fetchSearchResults } from "@/api";
import SubLayout from "@/components/SubLayout";

export default function Search({ countries }) {
  return (
    <div>
      {countries.map((country) => (
        <div key={country.code}>{country.commonName}</div>
      ))}
    </div>
  );
}

Search.Layout = SubLayout;

//쿼리를 이용한 동적 라우팅을 위해 context 이용
//context: 브라우저의 접속요청에 대한 정보들이 저장되어 있다.
export const getServerSideProps = async (context) => {
  // 1. 검색 결과 api 호출
  // 2. props 리턴

  // const q = context.query.q;
  const { q } = context.query;

  let countries = [];
  if (q) {
    countries = await fetchSearchResults(q);
  }

  return {
    props: { countries },
  };
};
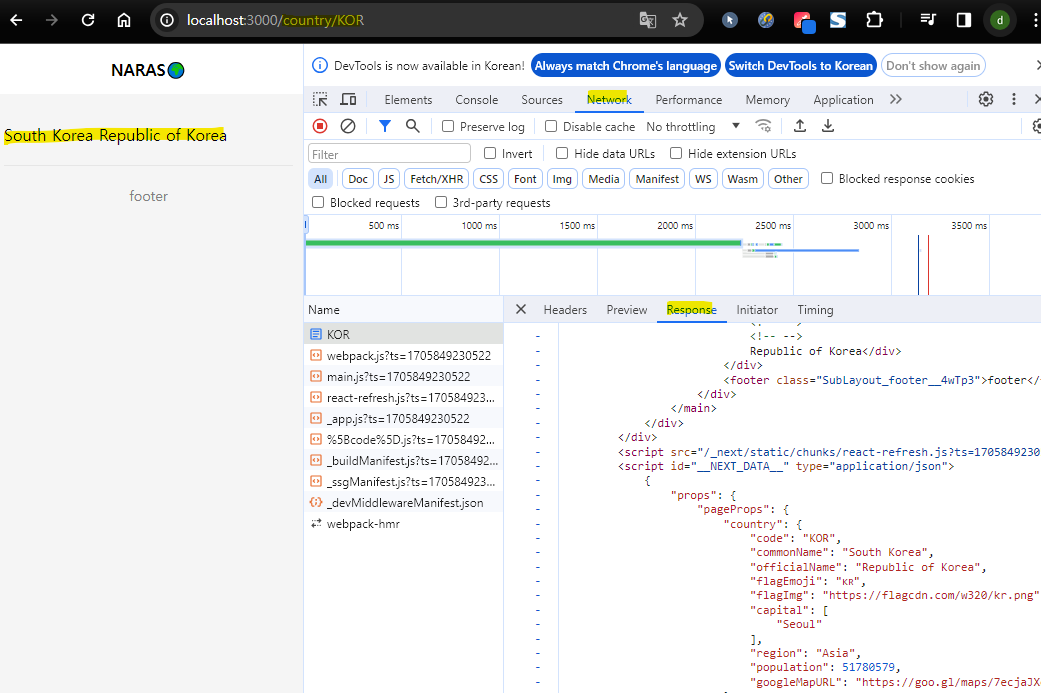
Country (국가 코드 이용한 동적 라우팅 필요)
[code].js
import { fetchCountry } from "@/api";
import SubLayout from "@/components/SubLayout";
import { useRouter } from "next/router";

export default function Country({ country }) {
  //code를 클라이언트에서 사용하기(useRouter 훅)
  const router = useRouter();
  const { code } = router.query; //구조분해 할당

  return (
    <div>
      {country.commonName} {country.officialName}
    </div>
  );
}

Country.Layout = SubLayout; //SubLayout을 적용시켜준다.

//code를 서버에서 사용하기(context)
export const getServerSideProps = async (context) => {
  const { code } = context.params;

  let country = null;
  if (code) {
    country = await fetchCountry(code);
  }

  return {
    props: { country },
  };
};
출처
https://kmooc.udemy.com/course/react-next-master/learn/lecture/39610746
반응형


